HDR
Perfect light is hard to find.
Actually perfect light is easy to find. All you have to do is adjust your camera’s settings to get the right exposure for the subject you’re trying to photograph. Unfortunately, that usually means everything else in the photo is either overexposed or underexposed.
That’s where HDR comes in. High Dynamic Range photography allows you to combine two or more pictures to get the best lighting from each.

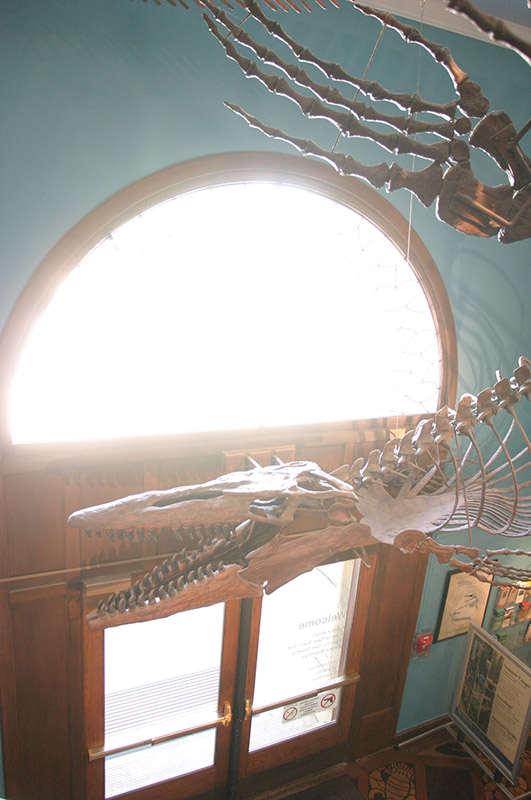
For example, here’s a picture I took in Dyche Hall, the natural history museum at the University of Kansas.
The main subject is the dinosaur bones (or casts of fossils if you want to be scientifically accurate) hanging from the ceiling. This shot gets a reasonably good exposure (maybe a bit over, but nothing I couldn’t fix in post-production) on the subject and part of its surroundings. I’m particularly fond of the weird shadows the bones make on the wall on the right side of the picture.
But what’s going on outside? Nothing, because it’s so blown out that even the came strips in the window are all but invisible. The exposure is so bad that the bright sunlight bleeding into the shot is fogging the edges of the window frame.
Canon EOS 10D, 17mm (17-40mm), 1/30, f/4, ISO 800

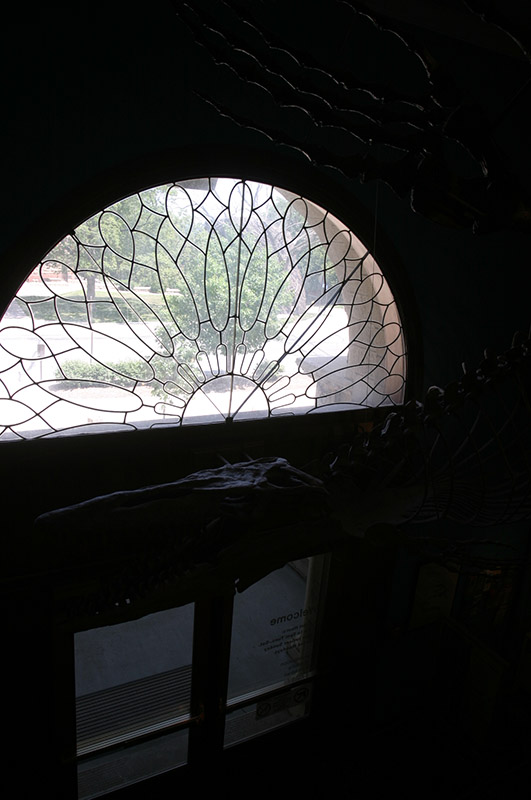
So I fiddled with the settings and came up with this. Now the window’s okay (a bit over, but again fixable). The rest of the shot might as well not be there. The ghostly traces of bones suggest a horror story in which a monster lurks in the shadows. That could be fun, but it isn’t really what I’m after here.
I originally shot these in my pre-HDR days (Photoshop could do at least some HDR merging as early as 2005, but I didn’t start playing with it until years later). When I tried to use Photoshop to mask the dark parts of this picture and paste the good parts onto the first photo ... well, it didn’t work.
For starters, the two pictures aren’t perfect matches (as one might expect from two photos taken from a hand-held camera). Look at the left edge of the window and you’ll see what I mean. That made it hard to paste the two together neatly.
And even when I got everything lined up, it still looked weird. The properly-lit window seemed out of place when surrounded by the light-fuzzed edges of the window frame.
What to do?
Canon EOS 10D, 17mm (17-40mm), 1/90, f/5.6, ISO 100
HDR to the rescue!
Photoshop’s “merge to HDR” feature combined the two photos into a single image with the best of both worlds. It did all the level adjustment, perspective warping and other fixes to make the good parts of both pictures fit into one even-looking image. I even got to keep the interesting bone shadows on the wall. I lost a little of the left edge in the process, but that seemed a small price to pay.
To be sure, this isn’t a 100% faithful reproduction of what I saw. I made it hard on the software by giving it only two not-very-well-matched images to work with. The result is a somewhat other-worldly version of light and color.

Canon EOS 10D, 17mm (17-40mm), HDR
You can give yourself and your software a better chance at a good result if you take care to match your images as closely as possible. Using a tripod will help keep things lined up, and it’s also a good idea to get multiple shots at different EVs by varying only one of your exposure triangle settings. I prefer changing the shutter speed between shots. That way the depth of field and color quality remain consistent. Besides, it’s not like you can include motion blur in merged images like this (unless you want some really ghostly effects).
This photo from the top of Bell Mountain, Missouri, is a good example of what you can get when you lock down on a tripod and alter only the shutter speed. All three pictures that went into this were shot at f/2.8 and ISO 100. For more about this image, see this blog post.

Nikon D7000, 10.5mm, HDR
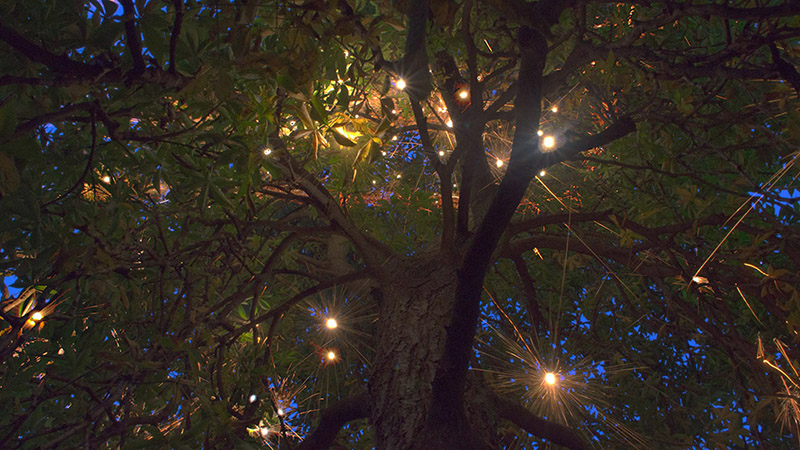
And sometimes it’s fun to play around with HDR just to see what you get. The three photos that make up this HDR composite were all taken using the same settings. The only difference was that the lighting in the scene changed from shot to shot. For more about this image, see this blog post.

Nikon D7000, 18mm (18-55mm), 5 sec., f/22, ISO 400, HDR
For more examples of how HDR works, have a look at these entries in The Photographer’s Sketchbook blog.
You’ll also find plenty of links to further information on the HDR board on Pinterest.
